25. February 2016
My last two weeks have been filled with writing server-side Swift libraries, installing Ubuntu on virtual machines and waiting for Travis builds to finish. While some of it was painful due to the immaturity of the whole stack, I had a lot of fun overall and I actually learned a couple of tricks on the way.
Update on Sep 16th, 2016: SwiftPM has had an Xcode project generation feature for a while. The current syntax is
swift package generate-xcodeproj, which will generate an Xcode project for your package. This makes this article’s workaround obsolete.
Update on Feb 29th, 2016: The trick of manually linking with generated static libraries works with SwiftPM that shipped with Swift Development snapshot from Feb 8th, but doesn’t anymore with the one from Feb 25th. Either keep using the Feb 8th SwiftPM and you’re set or, if you use the latest SwiftPM, you’ll need to force SwiftPM to create
.dylibs for each dependency with a line like this in yourPackage.swiftand link with these instead. When you do, you’ll see warnings about double linking of symbols in the console, but the debugger and your app will work fine. This is a workaround until SwiftPM supports generating Xcode projects officially.
Swift Package Manager
Even though I’ve been an iOS developer for the longest, working on Buildasaur (OS X app) and several Node.js servers has made me pretty interested in backend development. And now that Swift is open source, I finally have a justifiable reason to go all in on it and start writing Swift servers.
I use the young, but quickly spreading Swift Package Manager to manage dependencies for my serverside projects, which run on Linux most of the time - however I do all my development on a Mac. At the moment the Swift snapshots don’t come quickly enough, so I build it from source to get the cool new features.
Fair enough to say, SwiftPM is my package manager of choice for cross-platform Swift projects.
Xcode
One thing is now clear to me. As much as I can love Sublime Text for lightweight code editing, I can’t produce any good Swift code in reasonable time without Xcode. While there might be some snark about Xcode’s performance around our community, I firmly stand behind it. Mostly because I tried to work without it and failed miserably.
Xcode’s autocompletion, continuous rebuilding to show errors live, integrated debugger and a quick way to run things with a keyboard shortcut are indespensible features to me at the moment. That’s why I can’t work on anything major in Sublime.
As you’d guess, Xcode is my IDE of choice for all Swift projects now.
Xcode + SwiftPM?
There already is a Swift evolution thread on the planned integration of Xcode and SwiftPM, but who can wait for this stuff when we’re supposed to invent the future today? I decided to find a way to easily develop SwiftPM-targetting code in Xcode. And guess what, there are only 3 easy steps you need to take to do the same.
Here’s the stuff you actually clicked the link for 😇
I’ll walk you through them on my small Swift server. I’m assuming the following
- you have a valid repo with
Package.swiftand all that - you created an Xcode project which you have in your repo in the folder
./XcodeProject - you have your project’s files added to this Xcode project in an executable OS X CLI target
- you ran
swift buildonce - you’re using one of the latest Swift toolchains in Xcode
The promised 3 easy steps
1. Trigger swift build when building in Xcode
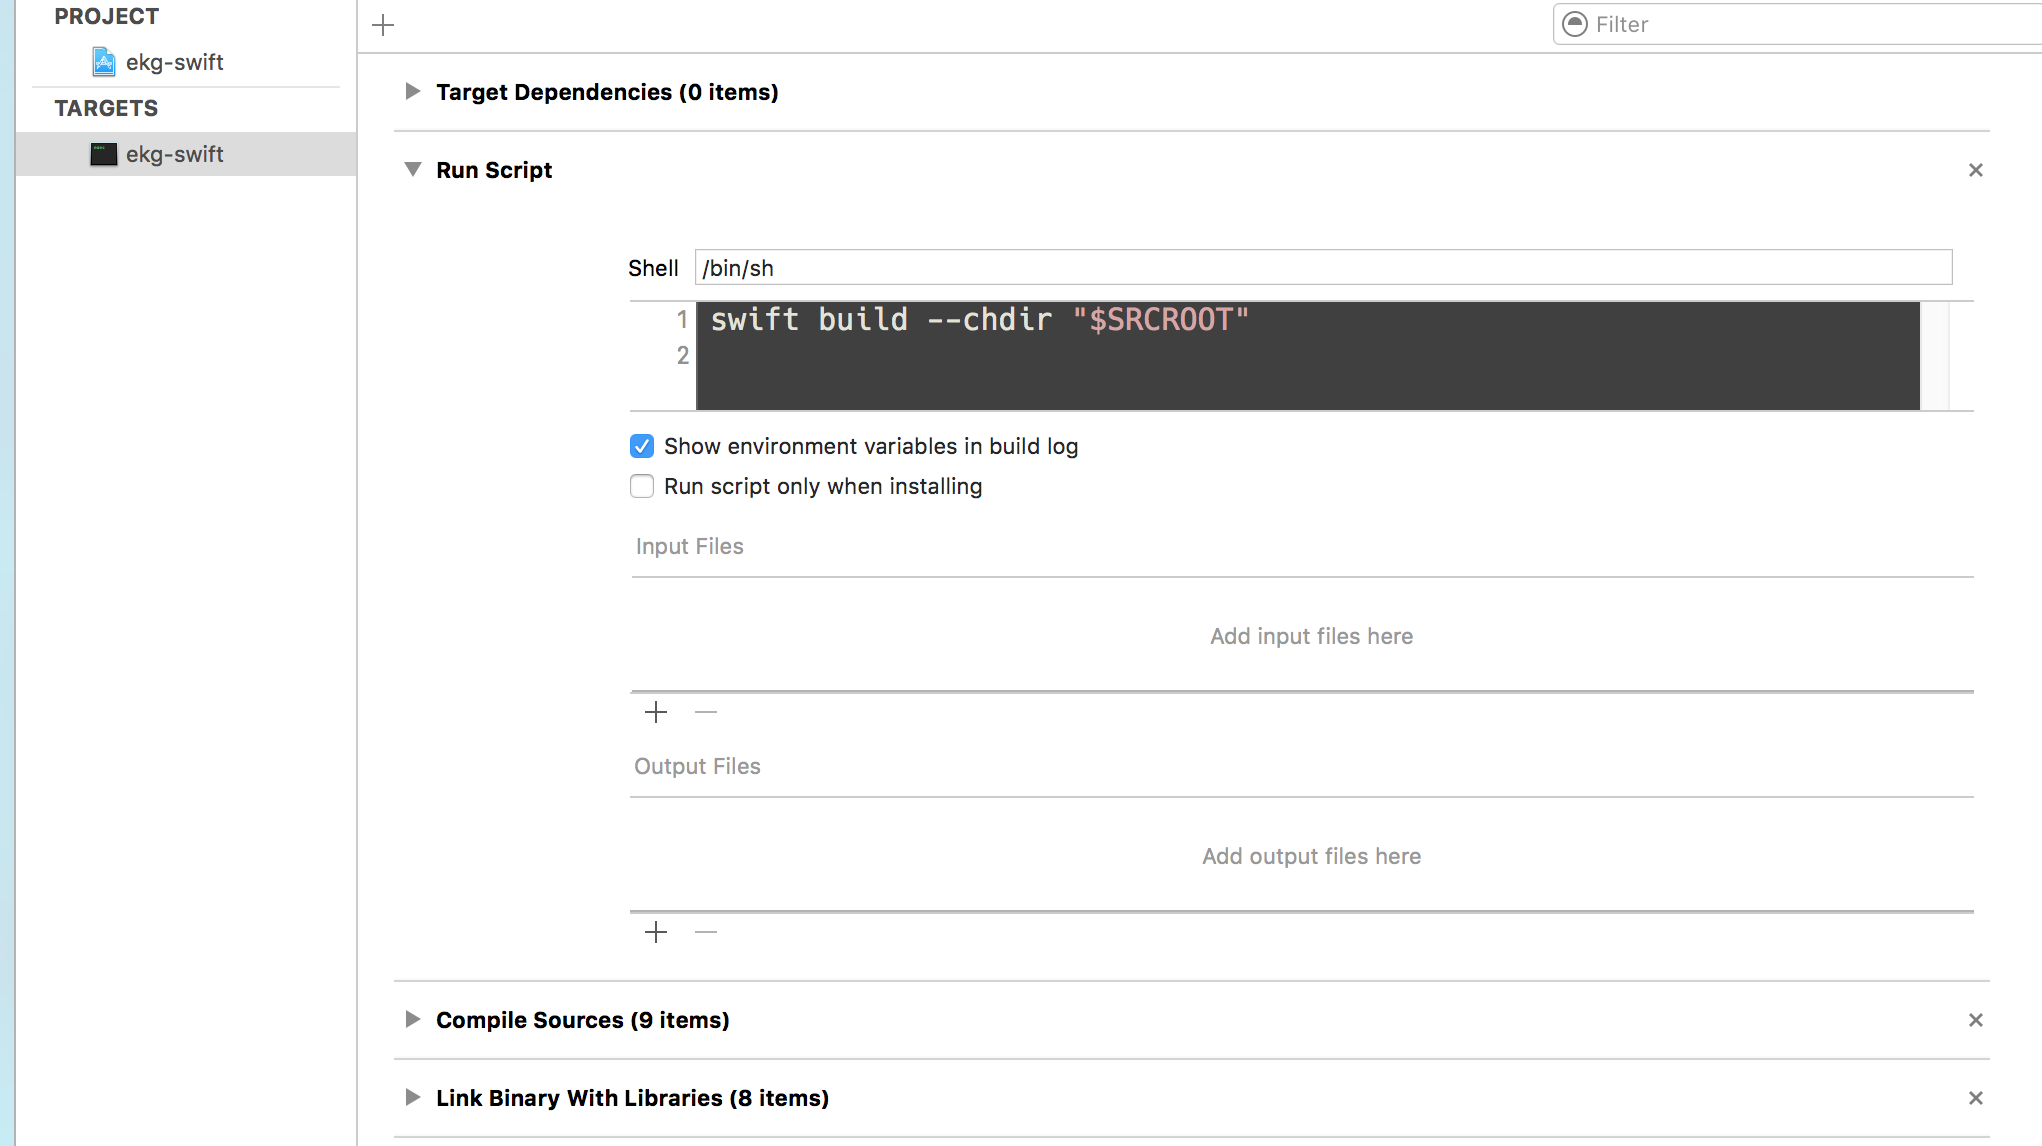
In order to handle you changing the Package.swift file properly, we need to ensure all your dependencies are built before we do anything else. This can be achieved with a simple script added to Build Phases of your target. Make sure to add it before the Compile Sources phase.
The script is just swift build --chdir "$SRCROOT". The --chdir option switched SwiftPM to the root folder of your Xcode project. Don’t worry if your project is in a nested folder, SwiftPM seems to find the Package.swift file even in the parent folder.
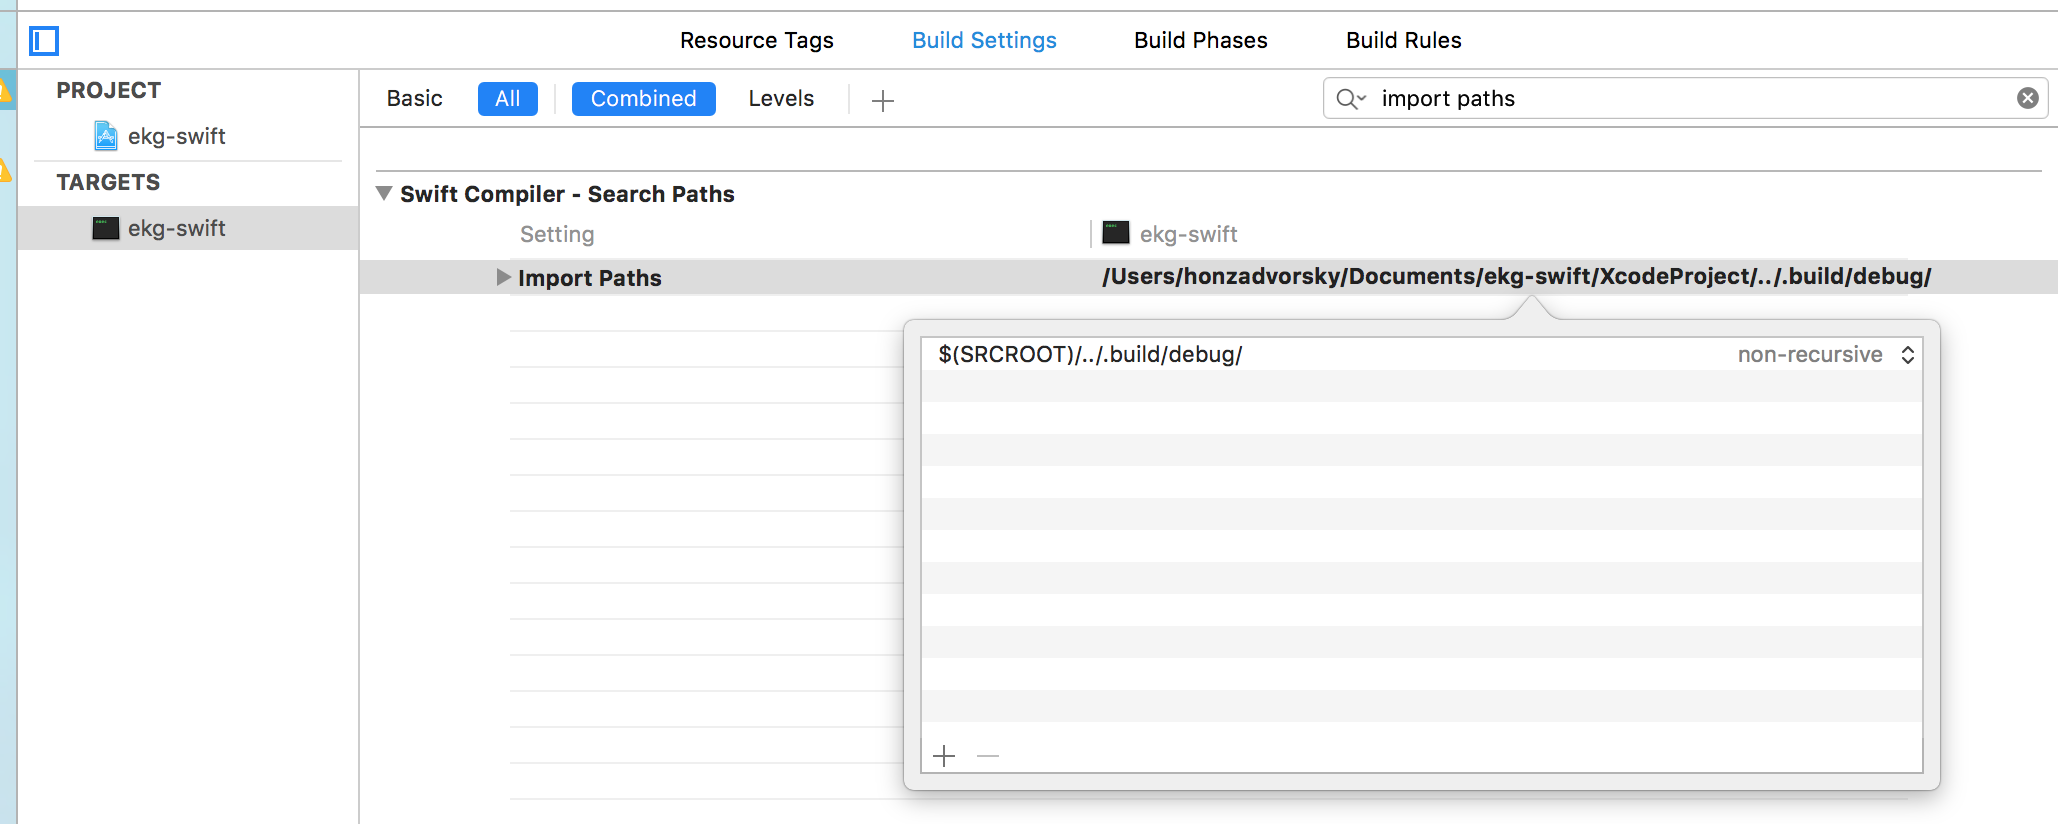
2. Add include paths
To get autocompletion and all, we have to point Xcode at where the dependencies have been built. We achieve that by going to the executable’s target’s Build Settings and search for “import paths”. There, we add the relative path from the Xcode project to the .build/debug folder. For me, that is $(SRCROOT)/../.build/debug/.
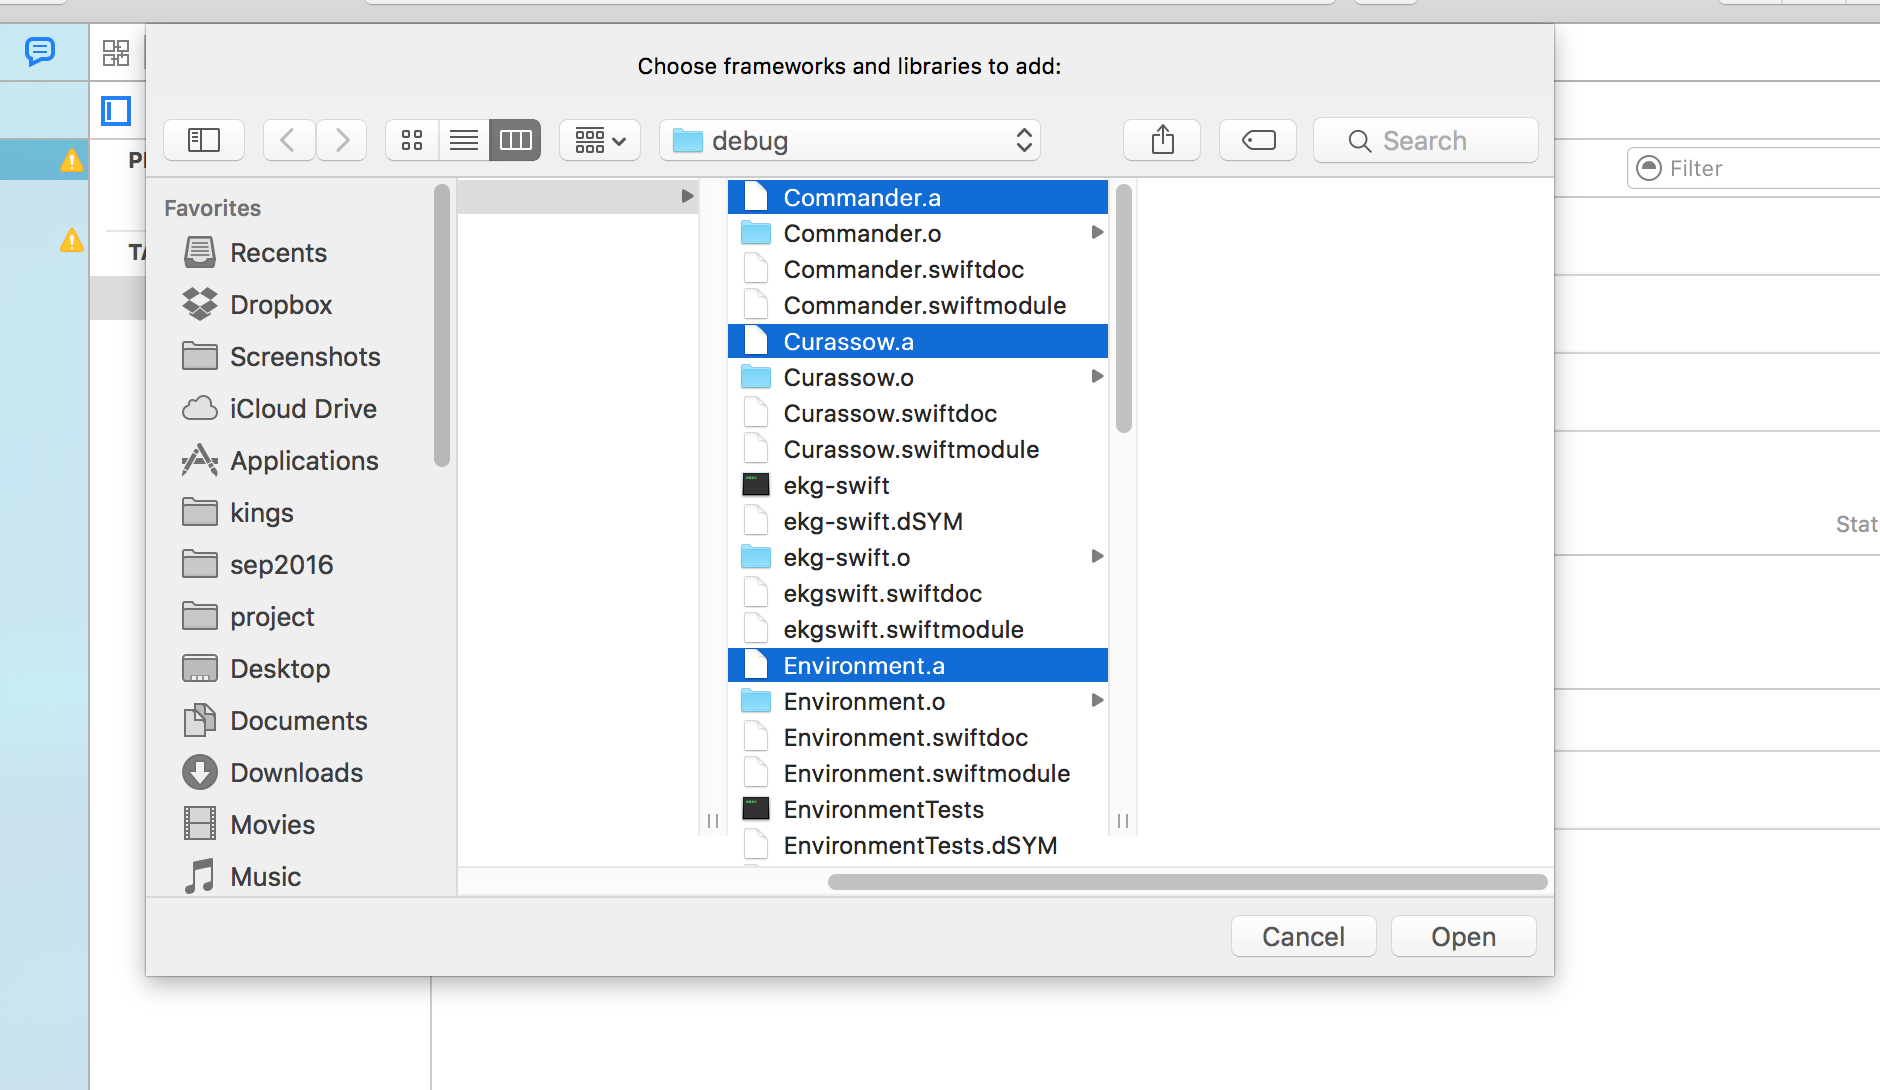
3. Link the static libraries
And last but definitely not least, we must tell Xcode to link the dependencies with our executable. I’m sure this can be improved with some help from the CocoaPods gurus of .xcconfig files, but I just went for a manual way: add all the .a static libraries to the linked libraries of my target.
Go to Build Phases again, expand the Link Binary with Libraries section and click the little plus button. There, since the .a libs aren’t in your Xcode project, click Add Other…. Since the .build folder is hidden, you need to use the keyboard shortcut “CMD+SHIFT+.“ to show hidden files, there select .build/debug and select all the .a libraries.
Make sure to select all .a libraries of the dependencies that you’re using, otherwise you’ll get a linker error and 😭
Final notes
Voila 🎉 Build and Run and you should see your executable running and attached to the debugger, while autocompletion and Go to definition should all be working.
Please note that at the moment, this will only work for debug builds, but that has worked fine for me (running a release build inside of Xcode isn’t great anyway, due to the lack of debug symbols the debugger is all over the place).
Make sure to commit this Xcode project into your repo and you’re all set.
Conclusion
Hope this worked for you and that you’ll give cross-platform Swift a chance yourself! Yell at me on Twitter with any feedback 😇
You can see a working example of this setup here.